
Kubernetes 101: Setting up Python Flask with Minikube
Kubernetes Unveiled: From Core Concepts to a Minikube Project for the Aspiring Data Engineer. This is specific to M1/M2 Macbook's with ARM chips but mostly hardware agnostic.

Introduction
Have you caught the Kubernetes (k8s) buzz? It's the talk of the tech town, being hailed for its ability to deploy software efficiently within containers. If you're intrigued by k8s and are keen to see it in action, you're in the right place! In this post, we'll embark on a journey to understand the essence of Kubernetes and Minikube and deploy a simple Flask REST API.

Why Kubernetes?
Traditionally, applications were stored on physical servers. However, distributing resources across multiple applications on a single machine presented challenges. This necessitated the evolution of deployment techniques.
Traditional Deployment Approaches:
Physical Machines: The archaic method, each application hogging its server.
Virtual Machines (VMs): Multiple VMs on one machine ensuring isolation and resource utilization.
Containers: A lighter version of VMs, sharing an OS among applications, ensuring portability and efficiency. Learn more about the benefits of containers here.
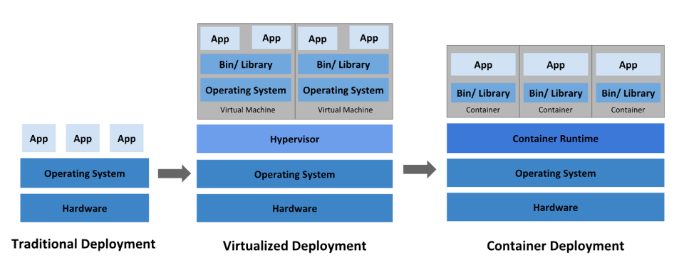
Figure 1: Understanding how you can deploy applications (Source: K8s docs)

Given these options, containers appear to be the best choice for modern-day application deployment. This is where K8s comes in, offering robust tools to manage these containers effectively.
Kubernetes: The What and Why
Kubernetes, at its core, is designed to help your containerized resources thrive. From service discovery to workload balancing, it provides a plethora of features that streamline deployment processes. However, it's crucial to remember that while Kubernetes offers several features akin to a Platform as a Service (PaaS), it operates predominantly at the container level, ensuring that processes are continuously driven towards their desired state.
Kubernetes Core Components Overview
1. Master Components:
Cluster: The entirety of your Kubernetes setup, comprising the Control Plane and Nodes.
Control Plane: The brain. Orchestrates the cluster, managing nodes and pods.
2. Node Components:
Kubelet: An agent on nodes ensuring containers in pods are running as expected.
kube-proxy: Maintains network rules, facilitating communication to pods.
Container runtime: The software that actually runs containers. Examples include Docker and containerd.
3. Core Control Plane Components:
kube-apiserver: The front end of the control plane; exposes the Kubernetes API.
etcd: A key-value store for all cluster data.
kube-scheduler: Assigns work, in the form of pods, to nodes.
kube-controller-manager: Runs controllers, which handle routine tasks. Examples include node operations and ensuring correct numbers of pod replicas.
cloud-controller-manager: Allows integration with cloud service providers, containing cloud-specific control logic.
4. Addons:
DNS: Provides DNS services for the cluster, enabling service discovery.
Web UI (Dashboard): A visual interface for managing and troubleshooting Kubernetes clusters.
Container Resource Monitoring: Tracks container metrics.
Cluster-Level Logging: Centralizes container logs for analysis and debugging.
For a more in-depth dive into each component, refer to the official Kubernetes documentation.
And now for the most anticipated part of this post! Getting your hands dirty with K8s and starting up an application!
Repository
Clone this repo to get started with this tutorial HERE
Python Flask Application with Minikube
What is Minikube?
Minikube simplifies Kubernetes, enabling a local playground on your machine. After covering the basics, you're ready to dive into setting up Minikube, running a Flask application, and navigating potential pitfalls, especially on platforms like the M1 Mac. You'll learn the ropes of building your Docker container, deploying it on Minikube, and troubleshooting along the way.
Setting Up Minikube:
Prerequisites:
Install
kubectl (homebrew)brew install kubectlInstall Qemu driver and socket_vmnet
brew install qemu && brew install socket_vmnetStart these services
HOMEBREW=$(which brew) && sudo ${HOMEBREW} services start socket_vmnetInstall Minikube
brew install minikube
Starting Minikube:
General start:
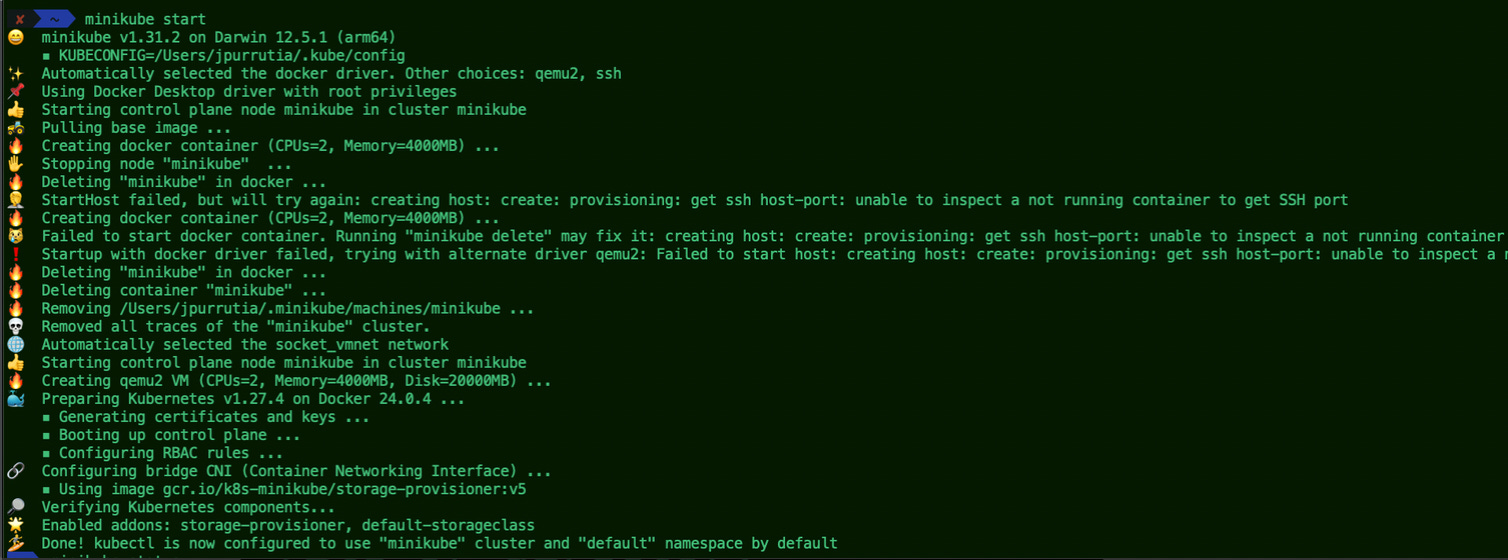
minikube start --cpus 4 --memory 8192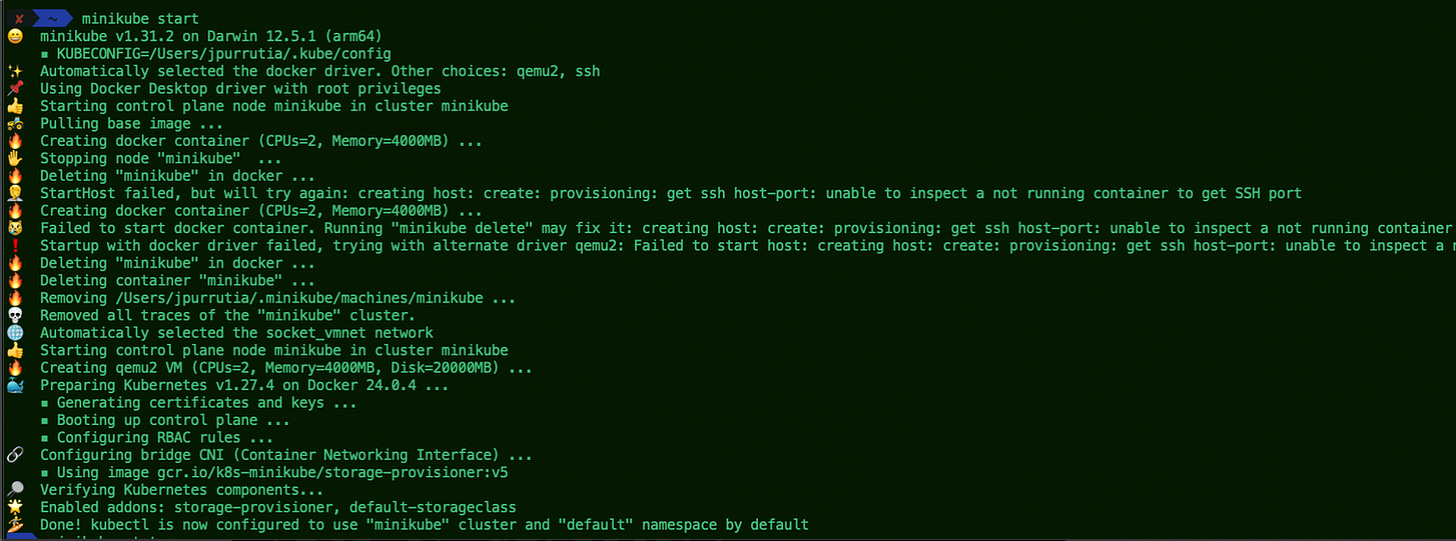
You’ll notice that the first attempt by Minikube failed. This is due to the M1 chip being more compatible with the qemu driver, thus the attempt at using that driver to spin up a cluster. The command below will attempt to use that driver.
Specific driver:
minikube start --driver qemu --network socket_vmnet --cpus 4 --memory 8192Ensure Kubernetes is correctly configured:
kubectl config viewCheck Minikube status:
minikube status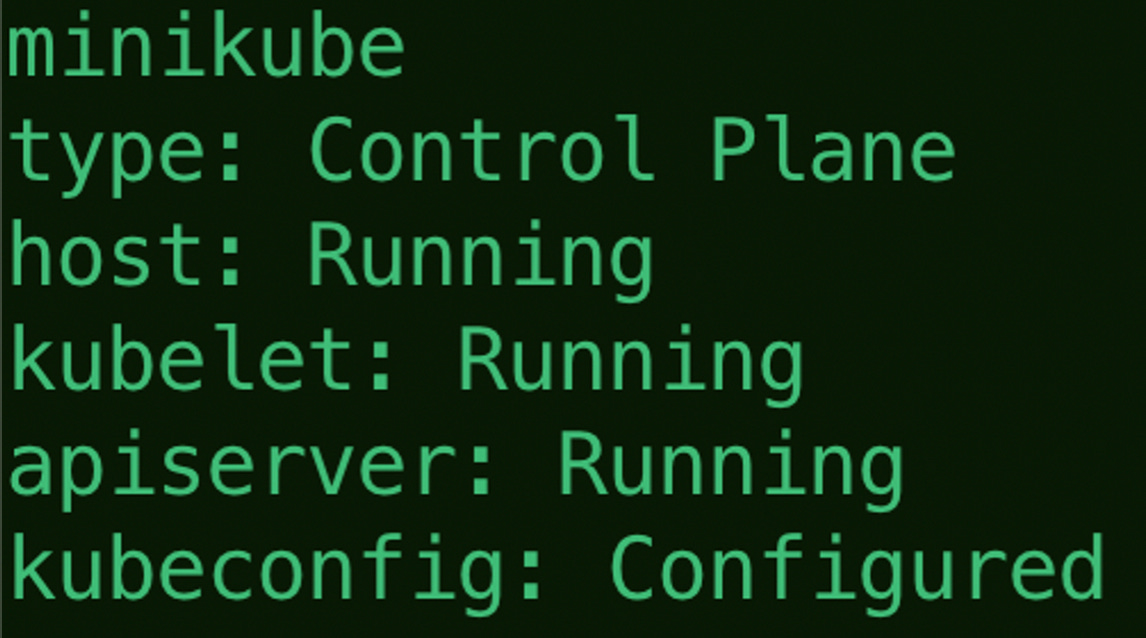

Building and Deploying Flask Application
Build and Run Docker Container Locally
Prereqs:
Docker
Pulled docker images to your local machine
In your environment, you may run into some Docker dependency issues and compatibility errors. I found this to be the case with my M1 Mac, but getting Docker to work can easily be done by ensuring you have the right platform, versions, etc. Once you clone this repo and run the below commands, you’ll be able to debug it if it doesn’t work immediately.
Testing with Docker Locally:
Use the following commands to test out the local Docker setup. In the makefile, each of these commands will help you build and run your image in a container with the defined configuration for your application.
source env/bin/activate
make all
make build
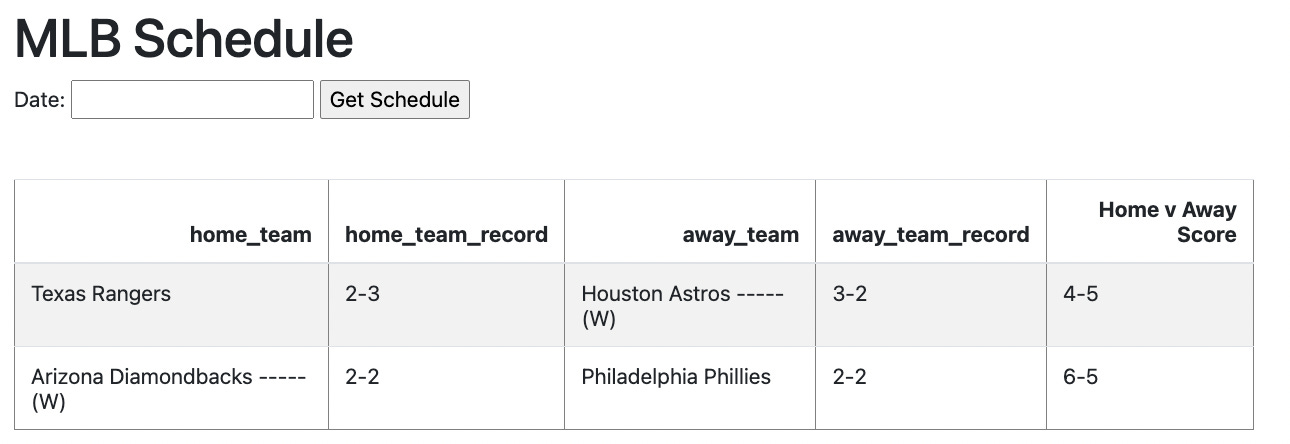
make runThe end result should be an application running on your localhost 8080 port to access the endpoint. Go to your web browser and access the app front end via localhost:8080.

This is what the front end should look like.
Getting K8s involved:
After building out the project with just docker, it’s time to start getting it to work with Kubernetes and Minikube. Make sure that your Minikube cluster is up and running.
Build the image
minikube image build -t mlb-schedule:latest .Check to see that the image exists
Check to see if the image you want to build is anywhere locally. It should not be, but this will give you peace of mind and show you how to look for your Minikube images.
minikube image ls | grep mlb-schedule
Apply the configuration in the YAML file to the pod
kubectl apply -f kube-mlb-schedule.yamlCheck your services
kubectl describe services mlb-scheduleRun the Kubernetes services and fire up that application!
minikube service mlb-schedule-service
Boom! There you have it! You should now have a Minikube service running on your local machine and a working application!
Shut it Down:
To shut down the application, all you have to do to stop your cluster is run:
minikube stop
minikube delete
Conclusion & Summary
In this exploration, we dove deep into the realm of Kubernetes, understanding its significance in modern-day deployments, and demystifying its components. The journey led us to Minikube, a vital tool for any developer wishing to dip their toes in Kubernetes waters without the heavyweight complexity.
From setting up Minikube to deploying a Flask REST API, we navigated common hurdles and learned the intricacies of working with containers and Kubernetes. This hands-on experience not only underscores the efficiency of Kubernetes but also empowers you with the knowledge to explore even more complex deployments and configurations.
As we wrap up, remember, that the tech landscape is ever-evolving. Stay curious, keep experimenting, and before you know it, you'll be steering your Kubernetes ship with prowess in the vast ocean of container orchestration!